
Are you tired of your website contact form getting spam messages all the time?! The good news is that a simple 5-minute change will help you stop Elementor form spam forever!
The method that I have found must successful is Google ReCAPTCHA v3. It’s simple to implement and free to use with your Google account.
The best part about reCAPTCHA v3 is that it works in the background of the contact form. It does not require any extra steps for the person filling out your form.
First, Let’s Bust Some Myths
When you hear Google reCAPTCHA, you may think of those image tiles – you know – can you find all the tiles with the buses or the motorcycles? Thankfully, this is not that! By the way, does anyone else (an actual human) fail those more than they would like to admit?
By adding reCAPTCHA v3 to your website, you can focus on the emails you *actually* want to receive. There’s nothing more annoying then a cluttered inbox full of junk messages.
Before moving forward, I just wanted to reassure you that this is not too technical. If you follow the instructions exactly, you can absolutely get this up and running on your own website, saying goodbye to spam for good.
Stop Elementor Form Spam with reCAPTCHA v3
What exactly is reCAPTCHA? It is one of the most popular ways to prevent spam and abuse by preventing bots from being able to submit forms. Version 3 specifically works in the background of your web page and generates a score based on user behavior. A higher score indicates a higher likelihood that the user is actually human.
I tried other popular anti-spam suggestions like a math question and a hidden, honey pot field. Neither of these worked for me. However, I did stop Elementor form spam after I added reCAPTCHA v3. And yes, I still receive legitimate emails to my website contact form!
Step One – Register reCAPTCHA v3
1 – Go the Google reCAPTCHA site
2 – Add a Label to easily identify your current website
3 – Keep the default radio button selected – Score based (v3)
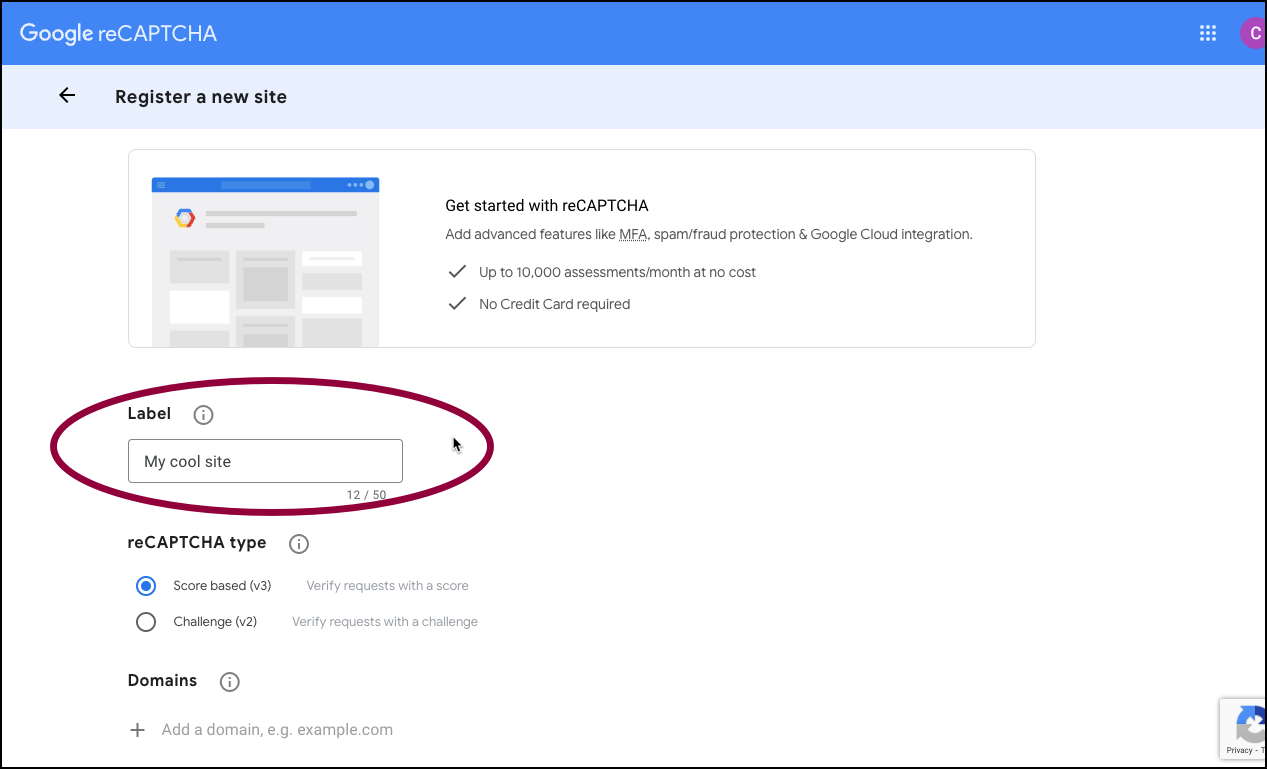
4 – Enter your website domain name
Please ensure your domain name does not include HTTP or HTTPS at the beginning. Additionally, please make sure you remove any extra slashes. For example, my website domain name is just www.pixandhue.com.

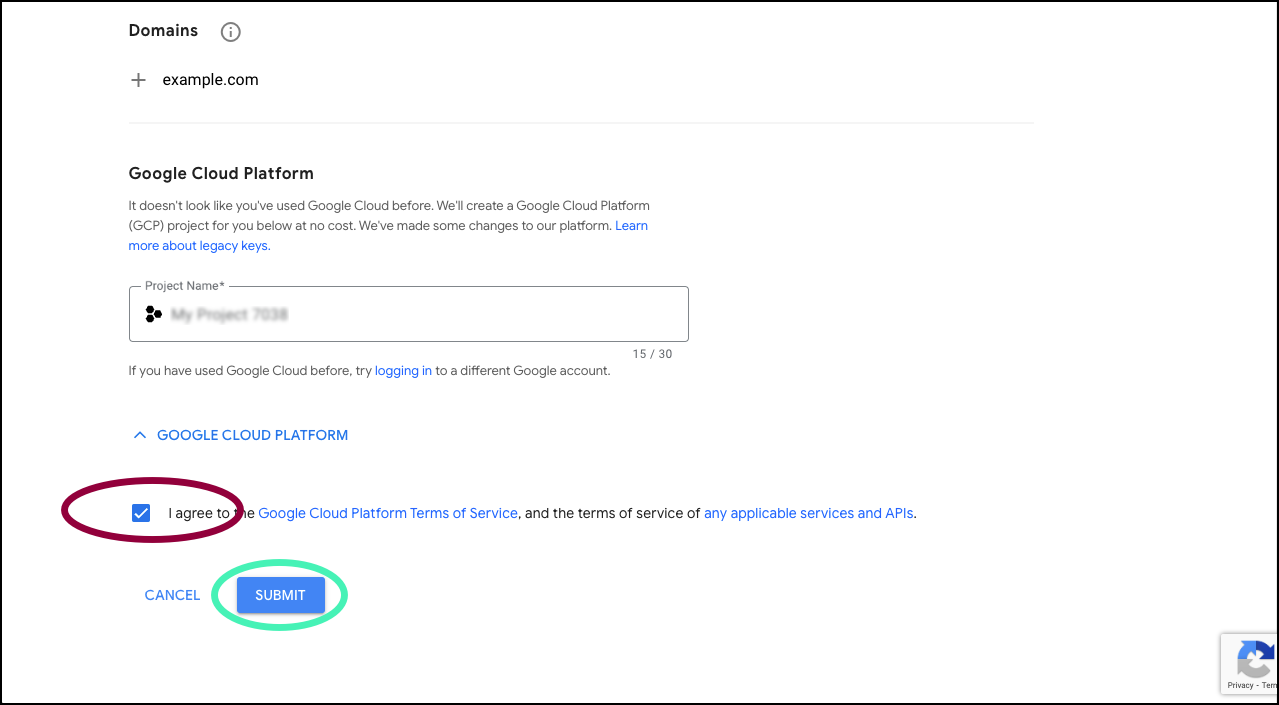
5 – Agree to Google’s Terms of Service and click Submit
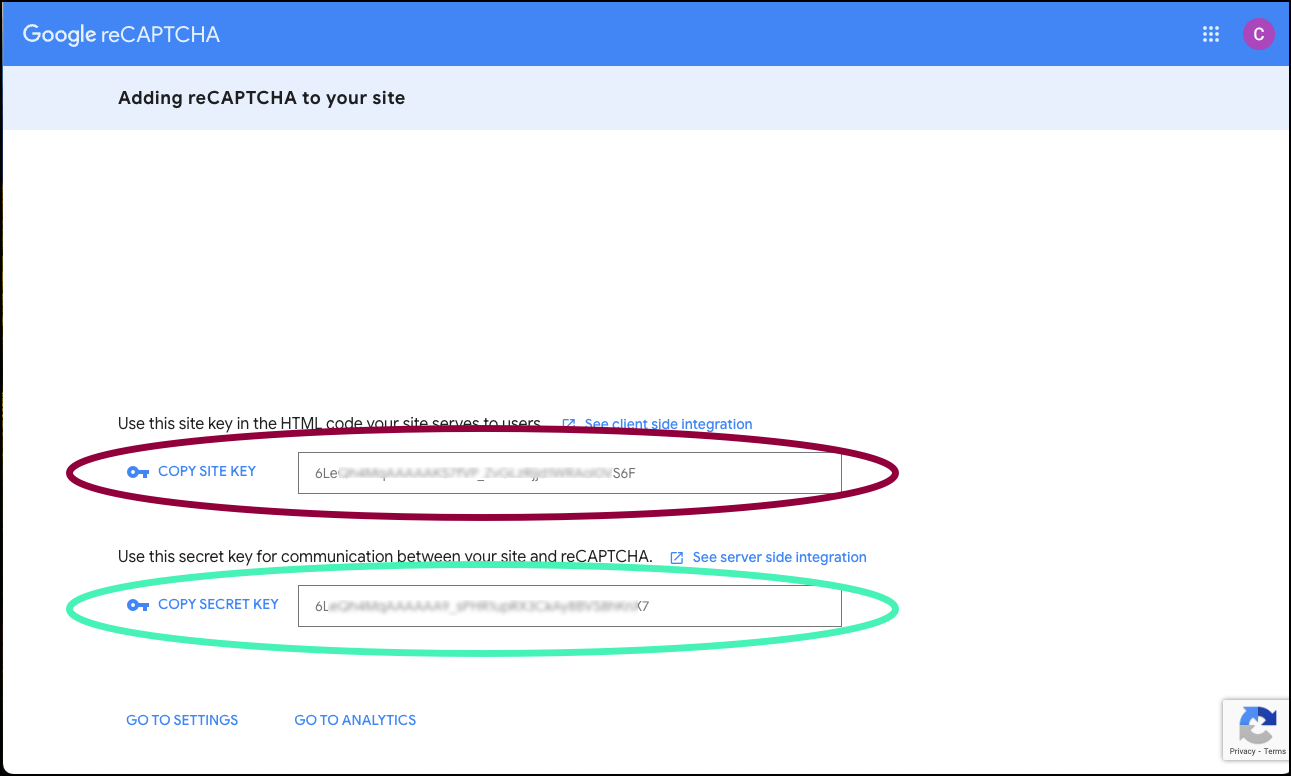
6 – Get your Site Key and Your Secret Key
Step Two – Go to the WordPress Dashboard
Now that you have registered your website with Google reCAPTCHA, let’s switch over to the WordPress Dashboard. Please make sure you have easy access to the Site Key and Secret Key. You will need to add them into the Elementor settings.
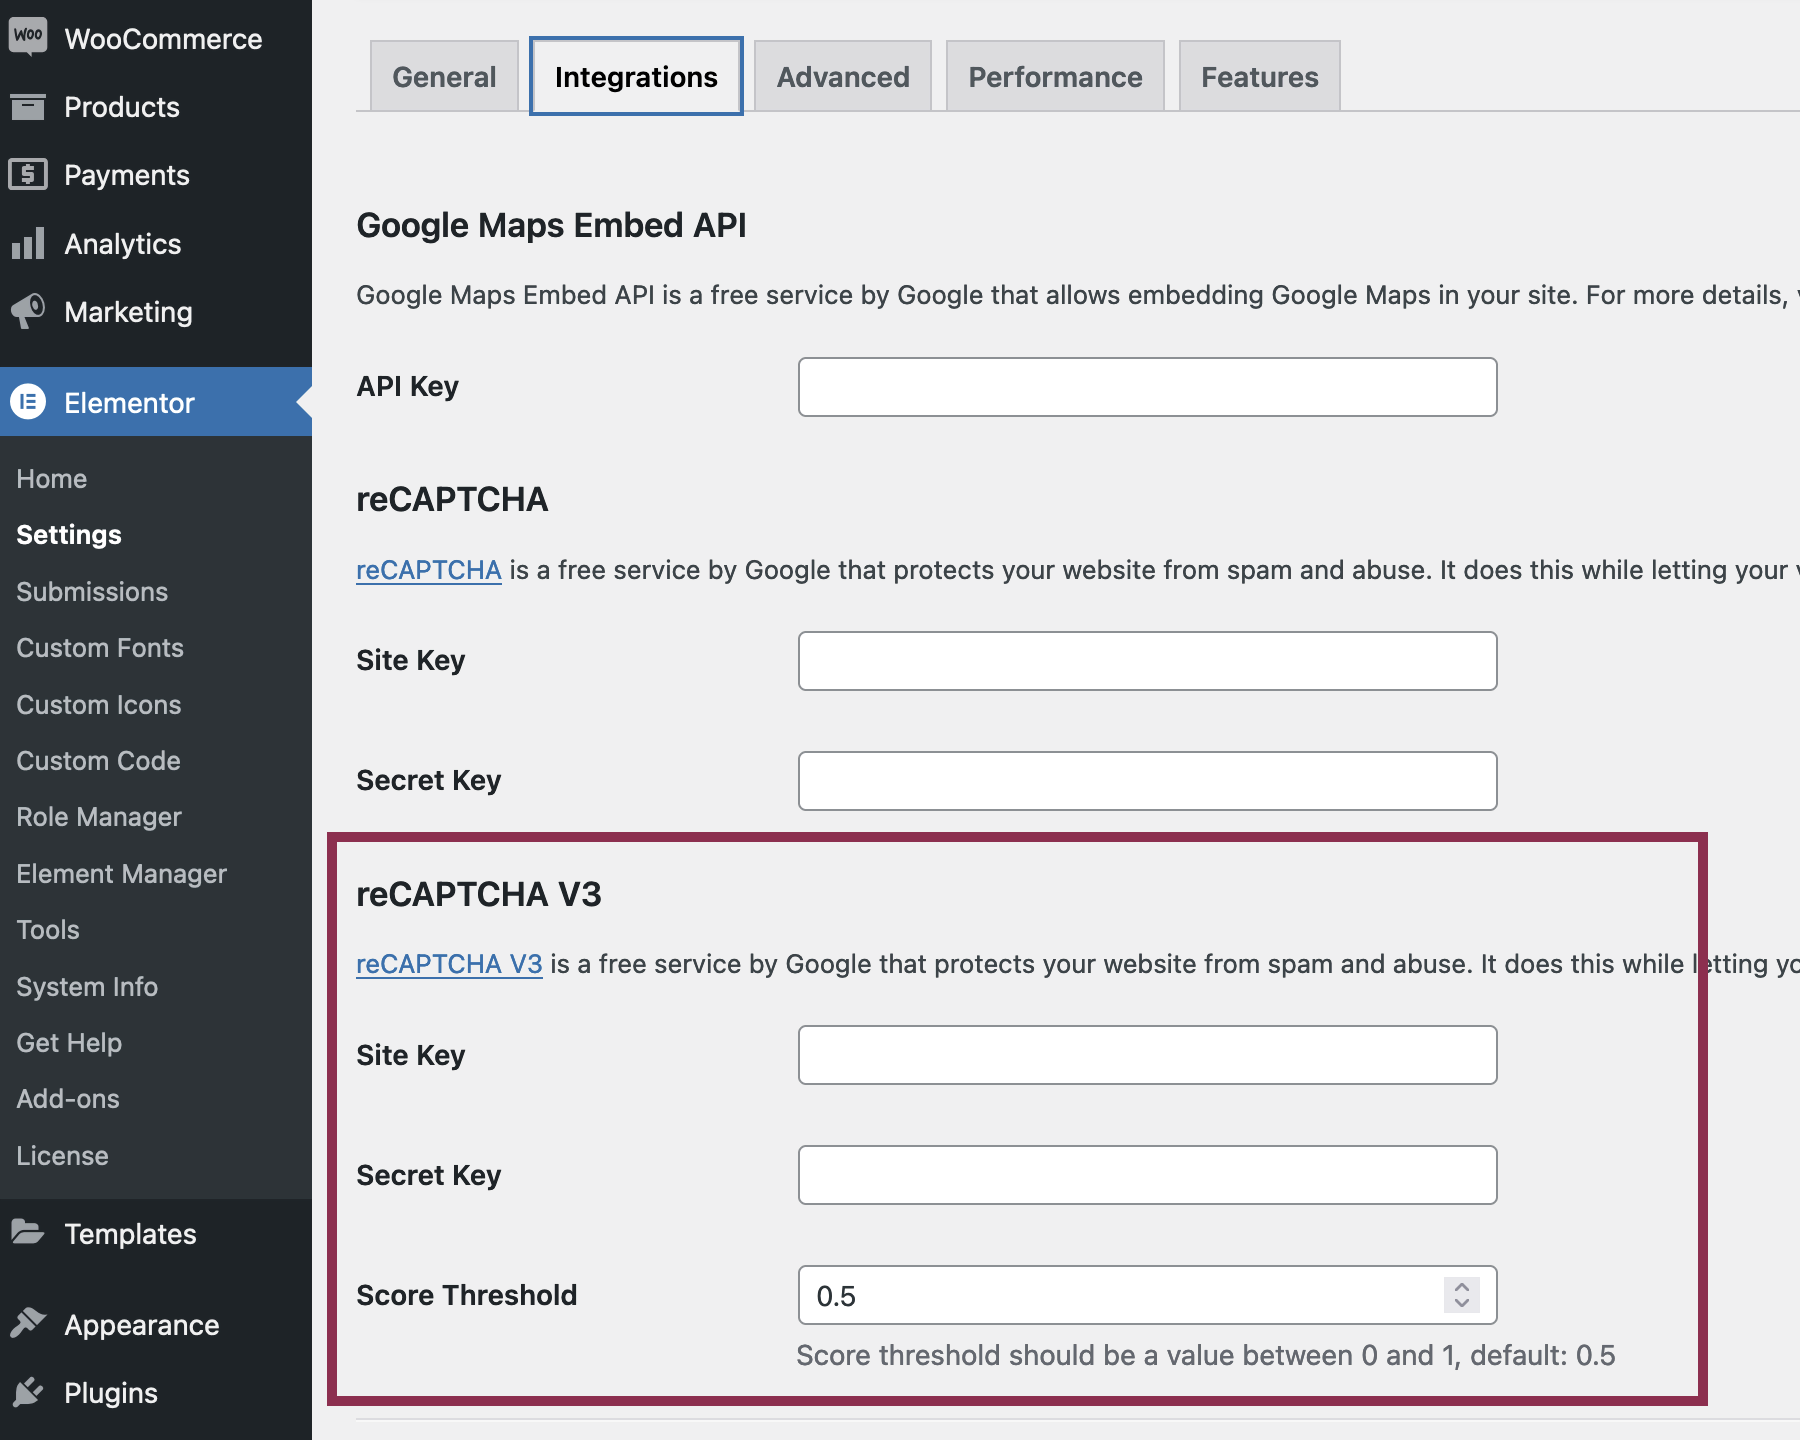
1 – Go to Elementor > Settings > Integrations.
From the Google reCAPTCHA site, copy in the following into the Elementor settings:
- Site Key
- Secret Key
- Keep Score Threshold at 0.5
2 – Update the Elementor Pro Form Widget
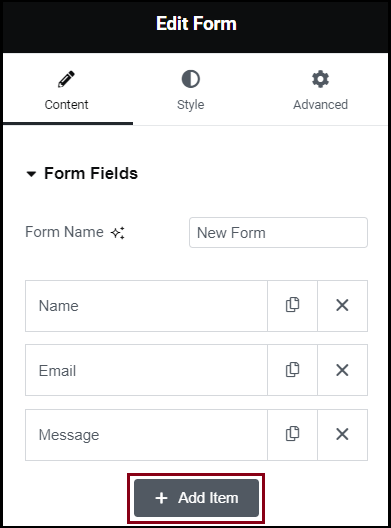
Go to the “Edit with Elementor” screen for any page or template where you are using the Elementor Pro Form widget.
Select the Form widget for editing. Within the widget settings on the left of the screen, click on the “Add Item” icon.
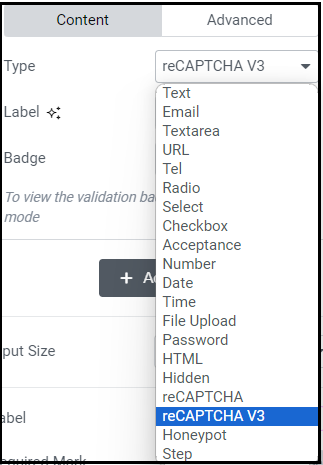
In the dropdown menu that appears, select reCAPTCHA V3. You can set the placement of the reCAPTCHA badge on the website page, including right, left or inline. On my own Contact page, I have set the badge placement to Bottom Right.
3 – Do I really have to display the Google badge?
Yes! The purpose of the Google badge is to let website users know that the form is protected by Google’s reCAPTCHA service. The badge provides a link to more information about reCAPTCHA and Google’s privacy policy.
The badge will only display on pages where you have added reCAPTCHA to the Pro Form widget. For example, the badge currently only displays on my website contact page.
Google does allow you to hide the badge, however you still need to include the reCAPTCHA branding within the flow of the form. More details can be found on Google’s website.
For most websites, I would recommend just displaying the standard Google badge. The badge is fairly small and not likely to bother the overall aesthetics of your website.
Final Thoughts – Test your Form!
Whenever you make changes to your website, it’s always a good idea to immediately review the design and functionality of any pages effected by the changes.
In this case, wherever your form is displayed on your website, review the page and make sure there are no issues with formatting or design.
Fill out the contact form, and make sure you still receive the submission to your inbox.
Now sit back, and enjoy the relief of a functioning inbox! Free of spam! You have managed to successfully stop Elementor form spam. I hope you have felt empowered to change your website for the better.